Everyone has a technique for cleaning their brushes. I've learned how to wash my brushes through watching YouTube videos and just through trial and error. If you'd like to learn how I wash my brushes, keep reading! :)
Showing posts with label How To's. Show all posts
April 15, 2013
October 3, 2012
How To: Depot Lorac Single Eyeshadow
I kept trying to figure out how to depot Lorac shadows and I couldn't find anyone that has posted about it...well here's help!
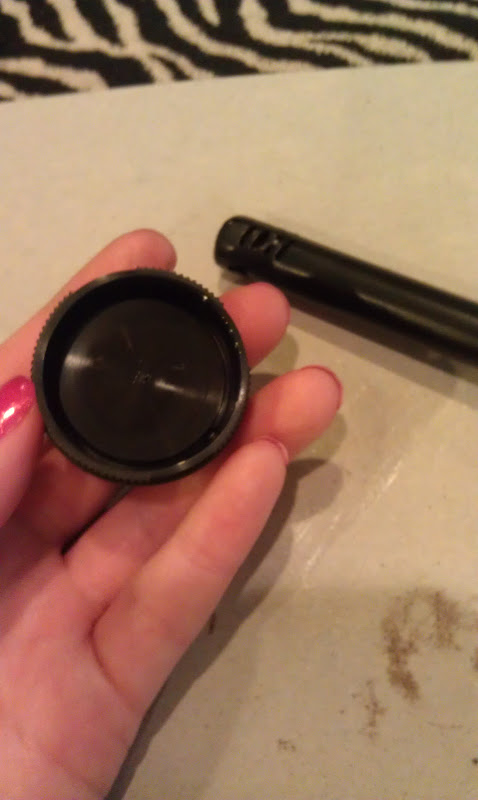
First, you want to take a knife (I used a steak knife) and push this in between the bottom of the pan and the top. With a little push, this should pop right out.
Anddd...it will look like this. Once it is out, you can tell that the plastic is really thick.
After that, I took a lighter and put it underneath the pan to get the glue loose. I went in between the lighter and pushing it with a knife. You have to be very careful because you don't want to overheat the plastic.
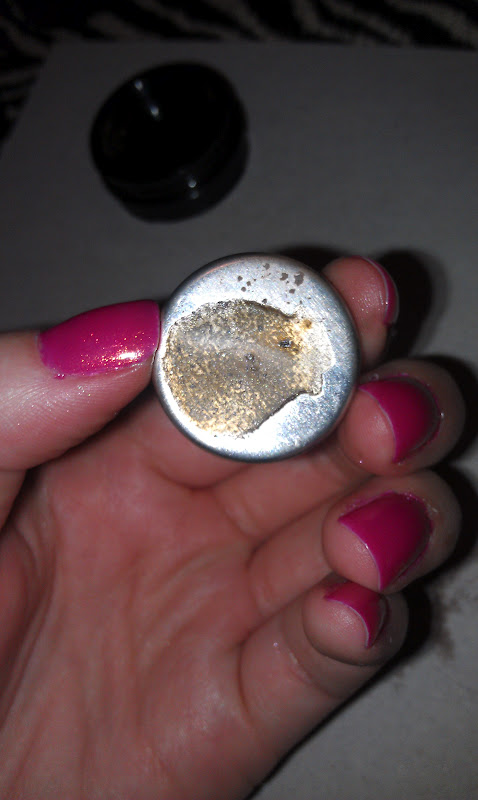
Once you get the plastic out, you get your pan. As you can see, there is a LOT of glue left on the pan. You can clean this off if you want, but I just kept it like that.
As for magnets, I just used refrigerator magnets and cut them to fit on the pan. Actually, the Lorac shadows fit perfectly in MAC palettes...so that's what I did! :)
Let me know if you have any questions and I hope this helped!
Labels:
How To's
May 22, 2012
How to: Keep Your Nail Polishes Mixed
Here's my solution! I turn each nail polish upside down in my rack for about an hour when I'm cleaning or whenever. I do this about once a month, just so the nail polishes don't get all separated. I've found that I can't turn every one upside down at once because they will end up falling off of the rack. I just do every other one so that the one beside it is able to stabilize the polish upside down. It's actually worked really well for me!
Do you have any tricks to keep your nail polishes nice and mixed?
Labels:
How To's
February 4, 2012
Updated: How I Store My Makeup Brushes
| Before |
![]() |
| After |
I've had my brushes like the top picture for a while. I loved the way it looked, but the shells scratched up my brushes. :( I didn't think it would because they aren't sharp. I guess since they are a harder material, it makes for easier scratching.
I decided to get those plastic vase fillers like everyone else has for their brushes. I like this method a lot better, even though it's not as pretty. My brushes slide in and out a lot easier and I don't have to worry about it damaging my brushes. So, if you're looking for a way to store your brushes, I'd choose the second method! :)
Labels:
How To's
January 14, 2012
How To: Use Lush's No Drought Dry Shampoo
I purchased this dry shampoo about a month ago and I'm just figuring out the best way for me to use it. The lady at Lush said to just flip open the cap and pour it in your hair. That didn't work for me AT ALL, so I decided to share how I've been using it and hopefully it is helpful! :)
First, I take the cap and pour some of the dry shampoo into it. It is okay if you take too much out because you can just pour it back into it when you are done.
Next, I take a powder brush. This is just a brush that I don't use because it isn't soft. I don't think it would ruin your good brushes if that is what you wanted to use.
After I find a brush, I just dip it into the cap that we poured some dry shampoo into. I usually take about as much as this picture shows.
Once you loaded up your brush, I just pat it onto my hair. Usually it takes about ten brush fulls to get my whole head covered. This is what it looks like when you apply it. There is a white cast in your hair, which you have to brush out. I usually wait a couple minutes before I end up brushing it out.
So I hope you found this helpful and maybe you will be able to apply this dry shampoo better! :)
Labels:
How To's
January 4, 2012
How To: Get the Most Out of Your Lush Bubble Bars!
This is the bubble bar I am using today! It was a holiday one and it's called Gingerbread House.
I actually split this bubble bar into four pieces, which I could have made them smaller. It was two for one though so I'll treat myself to 1/4.
Next, I put the piece into a stocking like this. This was just an old stocking that my mom had and it only goes up to about half of the leg. If you don't have one like this you could always just cut a stocking so there is an opening that is easier to get to. After I do this, I just hold the stocking with the bubble bar underneath running water. I don't break it up or anything, I just let it run under the water until all of it is gone.
This is how it ends up! There is about 4x as many bubbles than the typical way that Lush shows you how to use the bubble bars. Not only that, but you can use less and still end up with more bubbles!
I hope this helps and let me know if this works for you! :)
Labels:
How To's
December 3, 2011
How I Organize my Makeup (Updated)!
This is the same drawer as before, just my collection has grown! :P This is all of my eye makeup because I don't typically wear any face makeup. So you can take my ideas and turn them into what you need for your makeup storage!
In the little glass jar I have my eyeshadow primers. I find this easy to grab them and find the one I want quickly.
Next, is the container on the right next to my palettes. This has all of my single eyeshadows, duo's, and quads. In the front I also have my lip balms I use everyday as well as tweezers.
This is the container all the way to the left. It has my baked Ulta shadows all the way in the back, Sally's girl eyeshadows in the middle, and depotted NYX Jumbo pencils in the front.
The last thing in my drawer is my lip products. This was the little case in the back of the drawer. It's easier for me to do this because it saves space and I can just pull it out and see which one I want to use.
Finally is my mascaras and eyeliners! (Excuse my Christmas decorations, haha). These are on the ledge to my shower and I just put them in two little vases from the dollar store. I love this way of storing them because it looks cute and it is easy to find anything you need!
So that's it! If you have any questions let me know :)
Labels:
How To's
July 2, 2011
4th of July Nails
First, I picked out my base colors that I wanted to use. They are: Frostbite, Pelican Gray, and Ruby Deer.
Next, I painted my nails with two coats in the pattern I wanted them.
After that, on the red and blue, I put China Glaze's Platinum Pieces crackle.
I'm going to do a splatter pattern on the gray. So to keep it from becoming too much to clean up, I put tape around my cuticles.
Just put your colors on a plate or bowl. I actually used a lot more than this. I'm using the same blue and red I used as a base on two of my nails. The white I'm using is White on White by China Glaze.
This is what it turns out like! Just take a straw and dip it into the polish. I would recommend using one hard blow to blow the polish onto your nails. I would just experiment and see what works for you. It actually took me a while to figure out what works best for me :)
After, take the tape off and you will probably have a little bit of a mess. I just use a brush and dip it in polish remover and that will take most of it off.
The end product! I hope you all enjoy :)
Labels:
How To's
June 12, 2011
How I Organize my Makeup
This is how my makeup is stored in the top drawer of my bathroom! I don't own any face makeup so the only thing I have is really eyeshadows, liners, and mascaras but you can find a way to make it work with your makeup! :)
This is what is on the left side of my drawer. I found these containers at the Dollar Tree for a dollar! I wish I would've bought more because I love them. But anyways, this holds mascaras I don't typically use, eyelash curler, tweezers, mirror, and lip balms.
This is the jar I have in the middle by my toothpaste. It holds all of my eyeliners and the mascara that I use on a daily basis.
Lastly, this is what's on the right side of my drawer. In the back I have Sonia Kashuk and Sally Girl shadows. In the middle, it's a mix between Covergirl and ELF. I have them paired with the same brand and then in abc order. (I'm a little OCD) hahaha. In the front I have my eyeshadow primer, gel liner, and just a random shadow.
I hope this helped you get ideas on how to organize your makeup. I love that I organized mine because now I know where everything is! Good luck! :)
Updated Makeup Storage!
Labels:
How To's
May 19, 2011
How I Depotted My Palladio Eyeshadow Primer
I could not reach the product in my Palladio Eyeshadow Primer anymore so I decided to depot it. I started off my using just a regular kitchen knife and cut it in the middle. This took about five minutes before I could break it in half and seperate the two pieces.
Next, I used the wand that the primer came with & scooped it all out. To my surprise there was A LOT of product left inside the tube!
This was how much product was left that I couldn't get to! I bought this container from Sally's but it had the little confetti for your nails in it. I put it into my nail accessory organizer, so I had a free little container. I'm sure you cant find these containers at Walmart for a lower price. I'm so happy I tried this. Even though Palladio Eyeshadow Primer is only $8, it's worth getting all of what you paid for!
Labels:
How To's
May 14, 2011
How I Store my Makeup Brushes
I love my brush storage! Many people on Youtube bought tiny little clear beads to fill their vase & put their brushes in, but I decided to be creative! I bought crushed shells from Micheals instead. They were $3.99 and it was enough to fill two other vases. I bought the vase at Dollar Tree, which made the end cost about five dollars! It's original & I love it! You girls should give it a try! :)
Updated Brush Storage!
Labels:
How To's
April 29, 2011
How I Store my Nail Polish & Accessories
First up is my nail polish, of course! :) I got this rack for Christmas from my parents (they bought it off of ebay) & I love it to death! It holds all of my nail polish, for now at least, and it looks very organized. I know I'm going to buy more polish, so in the future I'm probably going to just use this rack for my China Glaze polishes.
Next, is my rhinestones, glitter, & little nail art pieces. I bought these cases from Wal-mart & they were about $6 each. Each of the little round holders is separate from the holder, so you can just take the ones out that you want, which I love about this. I think this is a way better deal then buying it from Sally's or a beauty supply store because just five of the little round holders is $6!
Lastly is all my nail care stuff! I bought this container from Wal-mart for about $5. The top drawer holds nail files and buffers. The middle drawer has nail clippers, brushes, cuticle clippers, and things like that. The last drawer has nail glue, rhinestone glue, and the fake nail that I practice designs on.
Thanks for reading! :)
Labels:
How To's
Subscribe to:
Posts (Atom)